When it comes to plant care, one often overlooked yet essential factor is the drainage of your planting pots. Without proper drainage, even the most well-tended plants can suffer from root rot, nutrient deficiencies, and poor growth. In this post, we’ll explore why drainage holes in planting pots are so crucial and share tips on how to create effective drainage in containers.
Why Are Drainage Holes Important?
Drainage holes in planting pots allow excess water to escape, preventing water from accumulating at the bottom of the pot. This process is essential for several reasons:
- Prevents Root Rot
- When water remains stagnant at the bottom of a pot, the roots can become waterlogged, leading to root rot. Root rot is a fungal disease that decays the plant’s roots and can kill the plant if left unchecked. Proper drainage ensures that excess water is removed and the roots can breathe, reducing the risk of root rot.
- Improves Oxygen Flow to the Roots
- Roots need oxygen to grow and absorb nutrients from the soil. Excess moisture can lead to an anaerobic environment, where the roots suffocate. Drainage holes allow air to circulate, promoting healthy root growth.
- Promotes Healthy Growth
- Plants thrive in well-drained soil. Good drainage helps maintain the right moisture level in the soil, preventing both underwatering and overwatering, which are common causes of stunted plant growth.
Tips for Ensuring Proper Drainage
- Choose the Right Pot
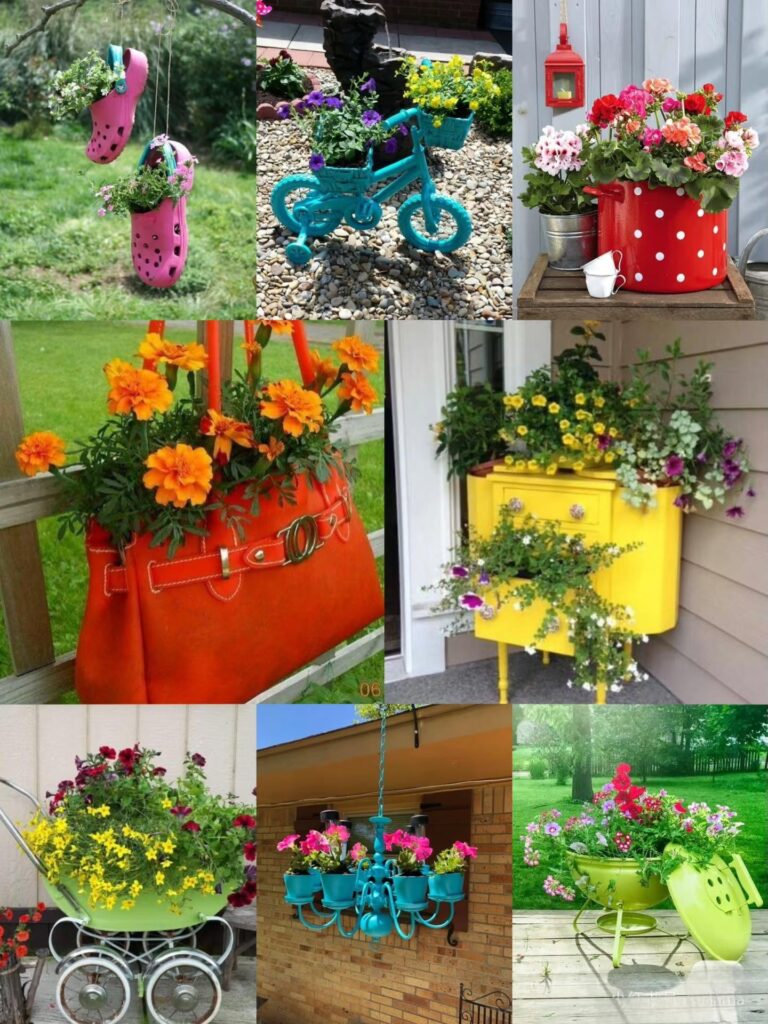
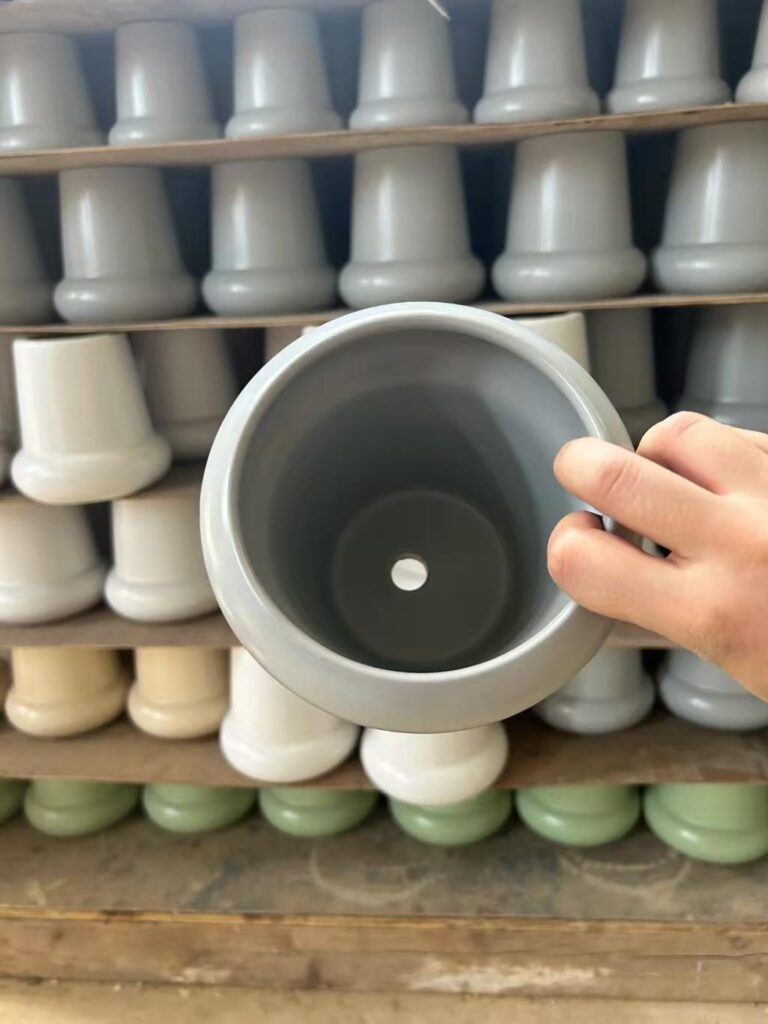
- Always opt for planting pots that have drainage holes. Pots with a solid base trap water, which can lead to waterlogging. Look for ceramic, plastic, or clay pots that come with built-in drainage holes. If the pot you love doesn’t have holes, it’s easy to add them using a drill or a sharp tool.
- Use a Saucer or Tray
- To catch any excess water that drains out, place a saucer or tray under the pot. This prevents water from spilling onto your floor or furniture and also helps maintain a clean space.
- Add a Layer of Gravel or Rocks
- Before adding soil to the pot, place a thin layer of gravel, rocks, or broken pottery at the bottom. This helps to facilitate water flow and prevents the soil from clogging the drainage holes, ensuring better drainage.
- Use Well-Draining Soil
- In addition to proper drainage holes, the type of soil you use also plays a role. Choose a well-draining potting mix suitable for your specific plant type. For example, cacti and succulents prefer a sandy, well-draining soil, while tropical plants like moisture-retentive but well-drained soil.
- Elevate the Pot for Better Airflow
- Elevating the pot slightly off the ground using a pot riser or small stones allows better airflow around the drainage holes. This ensures that water drains freely and prevents the pot from sitting in stagnant water.
- Check Drainage Regularly
- Over time, the drainage holes in your pot can become blocked by roots, soil, or debris. Regularly check that the holes are clear and unblocked, particularly after repotting or adding new soil.
What to Do if Your Pot Doesn’t Have Drainage Holes?
If you love a pot but it lacks drainage holes, here are a few ways to remedy the situation:
- Drill Holes Yourself: Use a drill with a ceramic or masonry bit to carefully drill holes into the bottom of the pot. Be sure to wear protective goggles and work on a stable surface.
- Create a Faux Drainage System: If drilling isn’t an option, you can add a few layers of rocks or gravel at the bottom of the pot, followed by a coffee filter or mesh to separate the soil. This will help excess water to flow through more efficiently.