Planting pots are not just containers for your plants—they can be a beautiful extension of your personal style and creativity. By painting and decorating your pots, you can add a unique, artistic touch to your home or garden. Here are some fun and creative ways to personalize your pots, from simple painting techniques to adding decorative elements that match your style.
1. Choose Your Base Material and Pot Type
Before you start decorating, it’s important to select the right pot for your project. Most people use clay, terracotta, or ceramic pots, but you can also work with plastic or metal pots. Make sure your pot is clean and dry before you begin—this ensures the paint and decorations will adhere properly.
2. Painting Your Planting Pots
a. Solid Color:
For a simple and modern look, paint your pots in a solid color that complements your decor. Bright, bold colors can add a cheerful touch to your space, while pastel shades give a soft, calming feel. You can use spray paint or acrylic paints depending on your preference. Make sure to use a paint that is weather-resistant if the pots will be used outdoors.
b. Ombre Effect:
A trendy design technique, ombre involves blending two or more colors to create a gradient effect. Start by painting the bottom of the pot with one color, and then gradually blend it into a second color toward the top. This technique works best with contrasting or complementary shades, such as blue fading into purple or pink into white.
c. Geometric Patterns:
For a more modern look, use painter’s tape to create crisp lines and geometric shapes. You can make triangles, stripes, or even a checkerboard pattern. This is a great way to add a structured and contemporary vibe to your pots.
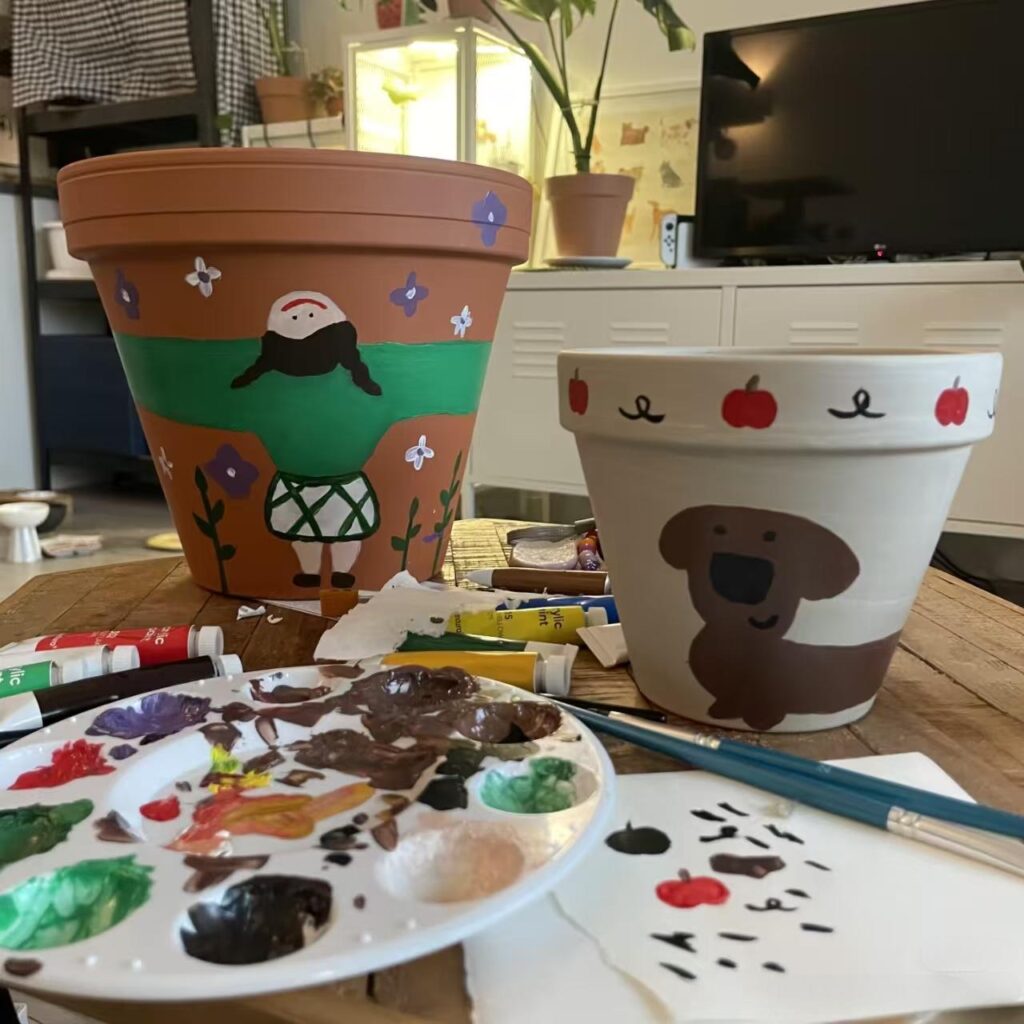
d. Hand-Painted Designs:
If you have a steady hand, try painting intricate designs such as florals, mandalas, or abstract art. You can go for bold, colorful designs or minimalist black-and-white patterns, depending on your style.
3. Decoupage and Paper Designs
If painting isn’t your thing, decoupage is an excellent alternative! You can use decorative paper, fabric, or napkins to decorate your pots, adding an extra layer of personality and texture.
Steps for Decoupage:
- Cut out your favorite designs or patterns from paper or fabric.
- Apply a thin layer of decoupage glue or Mod Podge to the surface of the pot.
- Place your cut-out designs onto the glued surface, smoothing out any wrinkles.
- Once the glue dries, apply another layer over the top to seal and protect the design.
This technique is perfect for creating vintage-inspired or boho-style pots. You can also combine decoupage with painting for an extra creative touch.
4. Add Decorative Elements
Decorating your pots isn’t just about painting; adding decorative elements can elevate your pots to a whole new level. Here are some ideas to make your pots stand out:
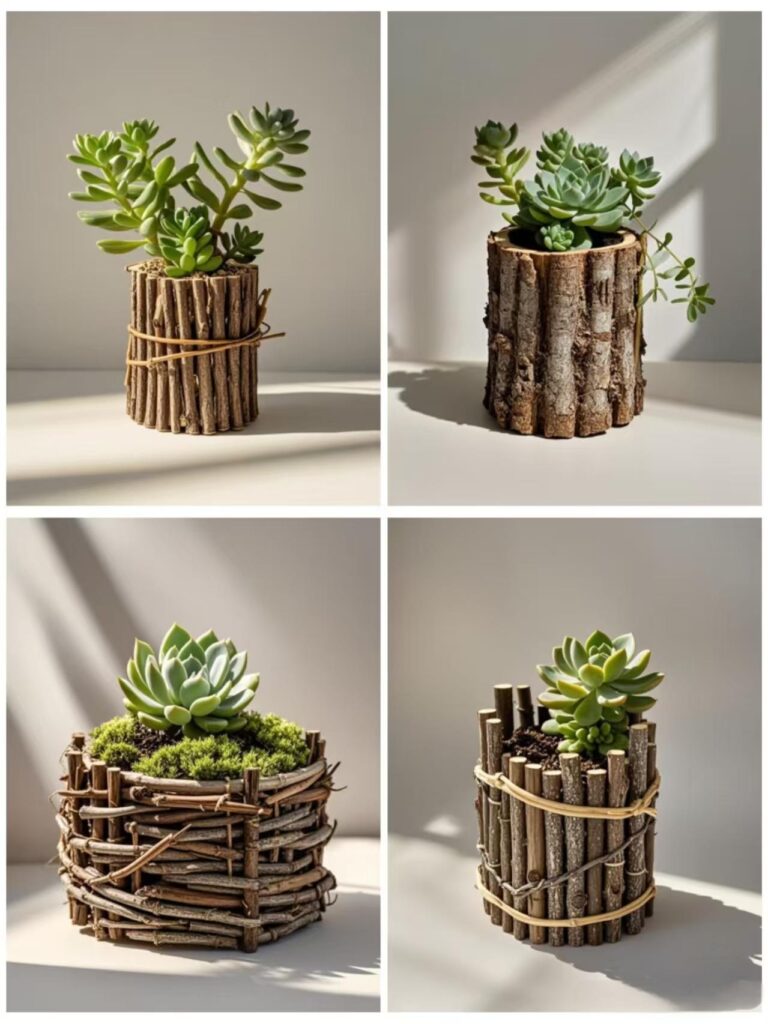
a. Ribbons and Twine:
Wrap your pots with twine, jute, or ribbon for a rustic, farmhouse-style look. You can also tie bows around the top or base of the pot for a touch of whimsy.
b. Stencils and Stickers:
If you’re not confident in your painting skills, stencils and stickers can be an easy and fun way to add designs to your pots. Choose from floral, animal, or custom-themed stencils to create detailed designs without any freehand painting.
c. Mosaic Tiles:
For a more intricate and creative look, you can glue mosaic tiles or broken ceramic pieces onto your pots. Arrange them in patterns, shapes, or even create a picture, and then seal them with grout to give the pot a textured, vibrant appearance.
d. Adding Stones or Gems:
For a sparkling, boho-inspired look, you can glue small stones, crystals, or gems to the outer surface of the pot. These can catch the light and add a touch of elegance to your décor.
5. Personalize with Names or Quotes
For a personal touch, paint or stencil a name, quote, or word onto your pots. Whether it’s a “Welcome” sign for your front porch, a motivational word like “Grow,” or the name of a plant (perfect for a plant nursery), this adds a unique flair to your pots. You can also paint numbers or symbols for an extra personalized touch.
6. Final Sealing and Protection
Once you’ve painted or decorated your pots, it’s important to seal the surface to protect your designs. A clear acrylic sealer or varnish will help prevent the paint from chipping, especially if your pots will be placed outdoors. Be sure to choose a sealer that is UV resistant to protect against sun damage.
7. Planting and Displaying Your Decorated Pots
Once your pots are beautifully decorated, it’s time to add plants! Choose plants that complement the color and style of your pots. For example, succulents look great in minimalist designs, while vibrant flowers can enhance the beauty of geometric or floral patterns.
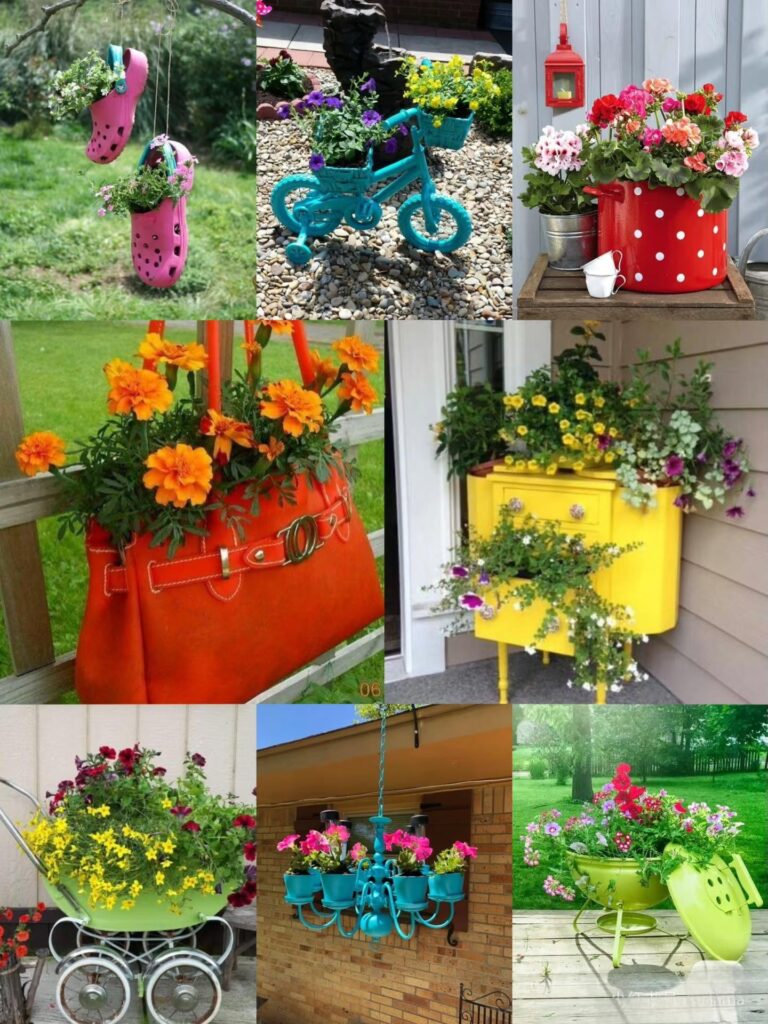
Display your decorated pots inside your home, on your balcony, or in your garden to bring life and personality to any space. Group several decorated pots together to create a stunning focal point, or place individual pieces around your home for a pop of creativity wherever you go.